Friday, February 26, 2010

Words to live by


"A . . . friend told me that if you're feeling stressed, get rid of the stuff you don't need and finish the things you've started. So I finished the ice cream and vodka in the freezer and I'm feeling lots less stress."

Julia Ormond, as quoted in More magazine

In line with the above, I've decided not to keep the kitch Moroccan lanterns. It's amazing how blogging about something can crystallize your thoughts. Thank you all for your comments. Gwen, I'd send them to you in Germany but there's probably some law against international trafficking in ornate pendant lamps.

Outside it looks like someone is hurling handfuls of goosedown from heaven. If snowed in, I plan to rearrange large pieces of furniture and throw out lots of stuff.

Is it snowing where you are? Will you be doing similarly?

Thursday, February 25, 2010

Moroccan style lanterns circa the 1960s


The longer you look at something you grabbed from the trash the more it loses its luster.

These three brass pendant lights caught my eye because I've been wanting a Moroccan lantern of some sort and the filigree seemed to have potential. Plus there was something so fabulously awful about them, all blue plastic encrusted and ready to hang in Barbie's Dream Harem.

Now they look to me like headgear for Sauron's henchmen.

What do you think? Should I attempt a de-bling? Embrace them as they are? (after a better cleaning.) Or quietly put them right back where I found them?

Wednesday, February 24, 2010

DIY Wednesday: Spring jewelry tree


Being a small space dweller, I'm constantly looking for ways to store my treasures out in the open, disguised as decoration.

A collection of brightly jeweled earrings and pins can add some spring color by way of a plain old tree branch. It's free, it's green and it's pretty. You could paint the branch, but I like the contrast of bling to plain wood.

Earrings can be clipped on easily enough. I recommend adhesive putty to keep the pins stuck to the branch.


This simple project was inspired by the photography of James Wojcik in the February issue of More magazine. You could (in theory) even store your jewels on a cooperative house plant.


Friday, February 19, 2010

High/Low/Way Low/J. Lo - Task and bedside lighting


Clockwise from top: Pottery Barn Architect's Table Lamp; Target Swing-Arm Wall Lamp; JCPenney Linden Street Adjustable Bridge Wall Lamp; IKEA Barometer floor lamp; Target Electra Desk Lamp; Walmart Grandrich Clip-On Reading Lamp; Walmart Pin-Ups Spot Light; IKEA Forsa work lamp; J. Lo Hooked on You.


The thing about semi-industrial looking swing-arm or task lighting is that the really cheap stuff doesn't look much different than the expensive stuff. Take for example Target's Bella desk lamp (above) versus Walmart's Architect Lamp.


Then there's the hack potential of various cheap IKEA parts versus Pottery Barn's Bristol Accordian Sconce.

Sadly, the most perfect lamp I found was Target's Task Lamp, $20, which I monitored for weeks without buying. Now out of stock. I still mourn its loss.

Wednesday, February 17, 2010

DIY Wednesday: Make a monster doll with tonsillitis


This is without a doubt a project you will find no where else on the interwebs - how to make a monster doll with removeable tonsils.


The project came about because this little guy, my great-nephew, was having his tonsils out. He also wanted a monster doll. The store-bought variety cost $20 to $40. And none featured removeable body parts.


I sewed two fleece "tonsils" (we had to consult Google images to even know what a tonsil looks like, and I do think these are a pretty good likeness) and attached them with velcro.


To make the doll, I followed the basic steps outlined here. This doll is made from a piece of yellow fleece from another project. The mouth and tonsils are also fleece, and the teeth were made from scrap pieces of felt. I favor buttons for eyes since they offer the beady blank look I'm going for.

One improvement from my last go at monster making is to sew a straight seam (by hand or with a sewing machine) and turn the monster inside out. Sewing the seam from the outside ended up not looking so good with fleece.

Here is the doll waiting to be mailed somewhere warmer than Brooklyn, New York.

After he arrived, I received the following text message from my niece:

"he loves his monster doll. he named him snatters. *don't ask me* we r on a neverending hunt for at least one of the tonsils. =) "

Tuesday, February 16, 2010

Bedroom micro-makeover and the search for articulating arm lamps


In the time that some people have taken to completely remodel a Victorian brownstone, I have moved my two new aluminum tables into the bedroom.

In apartment dweller terms, this is a major innovation. The smaller side table meant we could move the bed nearly one entire foot closer to the far wall, leaving nearly one entire foot more on the other side by the closet, so that I now have room to dance the can-can while picking out my clothes. Also the closet light no longer shines so harshly on Mr. Bromeliad as he oversleeps.

However, there remains the problem of reading light. Our previous lamp is a little too big and weird looking for the tiny table.


Since the tables are so tiny, sconces seem a smart way to go. I'm noticing many articulating arm, swing arm, architectural, task whatever styles of lighting - a bit industrial but not too much so.


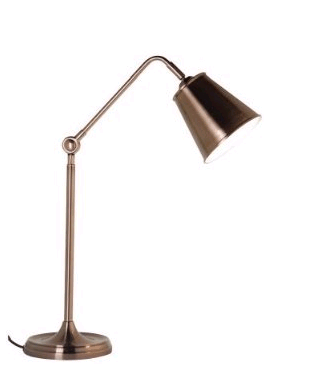
In a pinch, maybe a plain old desk style lamp would work, like the pharmacy lamp below.


Or why not a skinny floor lamp?


How do you light the bedside?

Thursday, February 11, 2010

Impulsively tearing things off the walls


Zack Motl tore all the mirrored tile out of this bathroom in one night.

Have you ever impulsively gone off on something you hated?

Mr. Bromeliad and I tore off the pink floral wallpaper border in our apartment living room one Saturday afternoon without asking first.

Satisfying.

See Zack's tiny place in The New York Times.

Snow!


Wednesday, February 10, 2010

DIY Wednesday: Intricate snowflake from plain paper


If you don't have enough real snowflakes right now, try this paper snowflake project from Cut Out + Keep. Materials are six pieces of plain old office paper, a glue stick, scissors and paperclips. Check it out here.

Tuesday, February 9, 2010

How do you read?

. . . blogs?

I usually use Blogger's Dashboard because it opens directly to the blog post and it's easier to leave comments. But it's teeny weeny.

I'm trying to use Google Reader since it's got a much larger window and I can read an entire post in the reader. But, when it comes time to post a comment, I have to scroll up to the top of the post, click the link, open the post on the actual blog, scroll down, fill out my name, E-mail, and URL, write my comment, click submit, fill out some spam filter and then click submit again.

Whew.

My compromise is to read smaller blogs in the Blogger Dashboard so I can somewhat more easily leave comments and bigger blogs in Google Reader since they can live without a 35th comment about how I'm swooning over their drapes.

There's a better way, right? Or are the Google People failing us here?

Images: William Burroughs by Herb Ritts via Silver Lining Opticians

Saturday, February 6, 2010

Did your first place look like this?


This is the first pad of Brooklyn Heights resident Lauren McGrath as featured in the March issue of Traditional Home.
My first place was a basement apartment lightly infused with sewer gas and home to waterbugs the size of mammals. I guess fashion writing in NYC pays better than cops reporting in Virginia. Doesn't hurt that mummy is an interior designer.

Cool thing with the twig mirror, no? I'm guessing wall decals. I also like that almost everything in her place is second hand.

Here's their blog.

Could you blog with your mom?

Friday, February 5, 2010

Kate Spade knocks off my pillow


OK, not really. But you can do this shirt for sure. It's just like the pillow. And if you continue to eat those chips, it will be just like the pillow.

My first flight October 18,1985


Wednesday, February 3, 2010

DIY Wednesday: Make an A Detacher inspired rose pillow from a thrift-store skirt


As mentioned last week, I was inspired by the big full flower pillow sold by Manhattan boutique A Detacher. There are semi-affordable knockoffs of the rose pillow style such as this one at Z Gallerie for $50. But why buy when one can make?

You will need:

  • a second-hand skirt, the larger the better. A full skirt will work best.
  • a second-hand pillow.
  • pins.
  • scissors.
  • a sewing machine. (It is possible to hand sew this project, but it would be an ordeal.)


I started with a size 24W silver skirt and a puffy 18-inch second-hand pillow. See the diagram below for an overview of how you can use the body of the skirt as a pillow cover and the hem of the skirt as a ruffle.


I used the skirt's zipper as my pillow zipper. (This is not always possible because the zipper on a skirt may be too short to work for a pillow. In an upcoming post, I will show you how to make a rose pillow from a skirt where the zipper is not usable.)

Turn the skirt inside out with the zipper side facing up.

If your second-hand pillow has a removeable cover, use this to create a pattern for your new cover.

Fold the old pillow cover in half and align it with the zipper on your skirt. This allows you to center the zipper in the middle of the new cover.


Unfold the cover and pin it to the top layer of your skirt. Cut around the old cover leaving about an inch on all sides as your seam allowance. (See photo below.)

If you do not have a pre-existing pillow cover to use, you can make a pattern. Measure the height and width of your pillow and add two inches to the height and two inches to the width for a one-inch seam allowance. Cut out a piece of paper of those dimensions. Fold the paper in half and align with the zipper of your skirt to center the zipper. Unfold the paper and pin to the top layer of the skirt. Cut out the fabric along the edge of your pattern.

Now you will need to cut out the "front" of your pillow. Turn the skirt over so that you have a section of fabric that does not have a seam running through it. You want a nice plain piece of fabric. Pin your old pillow cover or your pattern to the fabric and cut out the front piece. If you are using a preexisting pillow cover as your pattern, remember to leave an inch of extra fabric around all sides to create a seam allowance.

You now have a front and a back (with a free zipper!) for your pillow.

The next step is to cut out the fabric for the ruffle. The depth of your ruffle is up to you, but it can range from about three inches to about seven inches. My pillow used a deep ruffle of seven inches.

Use the bottom edge of the skirt because it is already hemmed, saving a step. From the bottom hem of the skirt, measure up the width of your ruffle and mark. Cut out the fabric, which will be a long strip three to seven inches wide and about two yards long.

Depending on the fullness of the skirt and the size of your pillow, the hem of the skirt may not provide enough fabric for a nice big rose. In that case you will need to cut a second strip of fabric above the first strip, hem one side and attach it to the first strip. My "ruffle" ended being about seven feet long and took two strips of skirt fabric (as shown in my diagram).


That's it for the cutting. Now on to the sewing. Take the front piece of your pillow cover and find its center point. (I do this by folding in in half and in half again and marking the corner with a pin.)


Unfold it and start pinning the ruffle to the fabric. For this particular pillow, I pinned with the wrong side of the ruffle up. This gives the "petals" a curved look. (But it doesn't look exactly like the ruffles on my inspiration pillow. I'll show you an alternative ruffle in an upcoming post.)


Contine pinning the ruffle in a tight spiral outward. Allow about a half an inch between each row.


It's going to start looking like this.


When you are done pinning, sew along your pin line, starting with the outside of your spiral and working in. When you're done, the back of your pillow will look like this. (Or likely a little neater.)


Fold your rose in toward the middle. Pin the back cover over the front cover with the wrong sides of the fabric facing out. Sew along all four sides.


Unzip the zipper and turn the pillow right side out through the zipper hole. Squish the pillow inside through the zipper hole and zip it shut.

Fluff your ruffles.

Place pillow in a position of honor and make all your friends come look at it.