Spring is finally here, and what better thing would there be to do except make an extremely large, loud statement necklace?
This necklace was inspired by Dannijo's Bea necklace with a hint of Dannijo's Nathalia necklace thrown in. The inspiration necklace will set you back almost a thousand dollars and has more rhinestones in it than any other necklace I've ever seen.

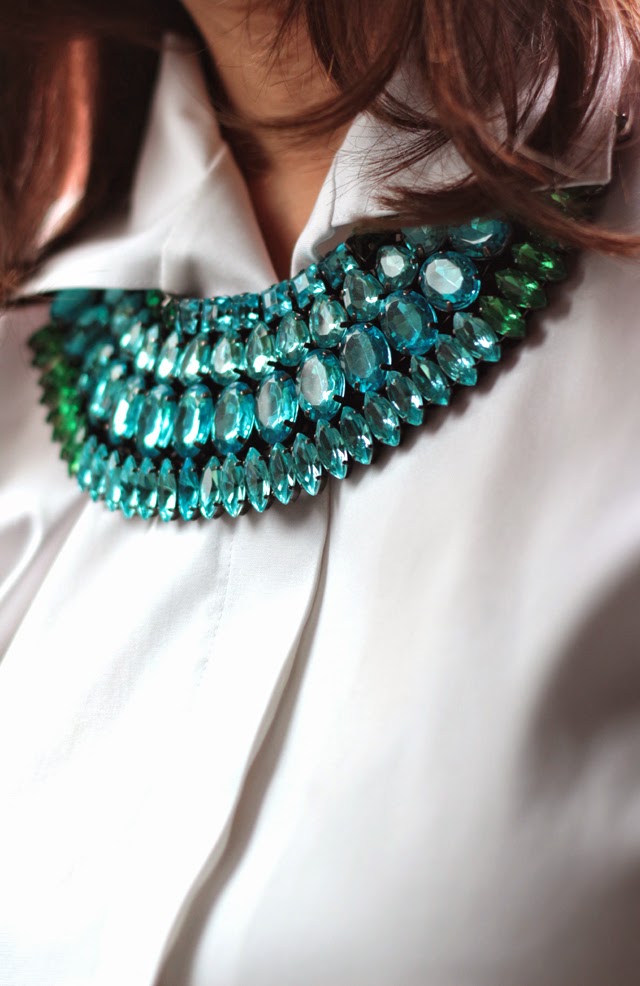
My DIY version wasn't super cheap (probably $30 or so in supplies) but not so bad when compared to the real thing. Most of my supplies came from Consumer Crafts, one of my favorite sources for affordable rhinestones in settings.
To make this necklace you will need sew-on rhinestone slider beads in a variety of shapes and sizes. Use a limited color palette (such as blues and greens) to keep the necklace from looking gaudy. I used the following:
- 14 8mm square beads in blues and greens
- 16 10 x 14mm pear beads in turquoise
- 16 13 x 18mm oval beads in turquoise
- 35 7 x 15mm diamond beads (I picked out the green beads from several strands of multi-color beads and also used one strand of turquoise beads)
You will also need:
- Jewelry wire
- 1 sheet plastic canvas mesh (10 mesh) in a color matching your stone settings. (I used black.)
- Triple jump ring chain or similar chunky chain
- Matching extender chain (optional)
- Matching lobster claw clasp and large jump ring
- Good jewelry glue like E-6000
- Four small jump rings (optional)

Twist the ends of the wire together, cut to about a half inch and bend the ends behind the beads.

Mark the center point of each strand of beads. (I used a small piece of blue tape.) Line up the beads on your canvas mesh so that they are centered.
Use a few piece of jewelry wire to loosely wire each strand to the mat at the center point of each strand. This is to temporarily hold the beads in place. You will later remove this wire.
Position the top strand of beads (the square beads) to have an even curve. Wire the ends of the bead strand in place.

At this point, the simplest way to attach the beads to the mesh is with jewelry glue. (See Step 7 before gluing. Don't glue down the mesh where you will be attaching your chain until after the chain is on.)

However, I had to be weird and also have a reversible option in case I want to dismantle this necklace later and make it into something else. If you also have commitment issues, you can stitch the bead strands to the mesh instead of gluing.
To sew the beads to the mesh, use heavy duty sewing or embroidery thread that is double threaded and matches your mesh. Sew through the wire strands to the canvas mesh and tie off with knots.

After the beads are firmly attached to the mat, you can remove the wire used to position the the beads. Then cut around the plastic mesh. I cut roughly with scissors and then more closely to the beads using small wire cutters. (You can also use fingernail clippers.) If you have glued the beads to the mesh, you can cut very close. If your beads are sewn on, cut more cautiously so you don't sever any thread.

Divide your chain into two equal lengths. Double each piece of the chain over and attach the chain ends to the mesh. Use small jump rings if the chain is too bulky to attach directly to the mesh. Glue around the mesh where the chain is attached if needed.

Attach an extender chain to the chunky chain. Attach a lobster claw clasp.