Showing posts with label DIY Decor. Show all posts

Thursday, April 3, 2014

My DIY stenciled storage boxes


A few weeks back I shared 10 stylish DIY storage boxes, which got me thinking that simple storage looks the best. And what could be simpler than plain cardboard?

Yup, a nice cardboard box with the top flaps cut off looks minimal and and kind of hip if you don't ponder it too much.

Then Amy Anderson, the queen of Mod Podge, asked me to try out Plaid's new Mod Podge stencils. They are meant to be used with Mod Podge and glitter. There is no more useless element in the universe than glitter, so I opted to use my stencil with paint. What to stencil? How about those dumb cardboard boxes?

I picked this cool faux bois stencil designed by Amy. I framed it with blue tape to avoid getting paint around the edges. And I used a blue tape "level" to keep my lines straight.


The stencil came with a spouncer, which is just fun to say. Any small sponge would do for applying paint to the stencil.

I used acrylic paint, which I kept on the dry side. I allowed each section to dry a few minutes before moving the stencil and painting again. After a few sections, I rinsed the stencil to keep paint from building up on it.


This project was cheap and easy to do. The stencil has an adhesive that helps it stick to a hard surface. 

On the down side, it took forever. I cleaned my entire pantry in between drying sessions with the stencil. And this was one box. I need three more pantries to clean. 


Then I ran out of paint before doing my next three boxes.


I recommend:

  • smaller boxes
  • more paint 
However, it certainly elevated my cardboard to true hipster status.

Here is more info about the stencils from Plaid. I was provided the stencil and spouncer for free. All opinions are my own. 

Have you started organizing your closets this spring? 

Wednesday, January 15, 2014

10 stylish DIY storage boxes


If you're feeling the need to tidy up for the new year, here are 10 stylish DIY storage boxes. To qualify for this list, they had to be easy to make, cheap to make and/or aesthetically fabulous.

There is no point in time-consuming DIY storage when there is IKEA in the world.

Above, no-sew felt storage boxes from Design and Form. Easy, stylish, cheap.


Abstract art paper boxes from Design Sponge. Easy and cheap for items that aren't too heavy since it's made from craft paper.

DIY storage boxes with a button closure from Skona Hem. Not easy but sure good looking.


Here's a storage idea from Jebiga Design Magazine. Not super practical for most of us, but if you have boxes you can't put out of sight, make them into artwork.


My own storage boxes, made from discarded blueprints. I made these four years ago and still use them. Practically free and not too hard.


On the left, inspiration from Scandinavian Deko. Sometimes plain old cardboard looks pretty good, especially with a nice consistent label (you could also try a bright washi tape.) On the right, cover round boxes with images of texture for a nature inspired look from  Craft and Creativity.


Fabric covered cardboard boxes turned into storage totes with the addition of thrift-store belts from Brit & Co.


My own faux ikat covered storage boxes. I've had these over four years and still use them.


DIY IKEA box makeover from Whimsy Darling. Plain white boxes are made artful with black paint.


A bit more of a storage folder than a storage box, but too cool to pass up, a DIY box from from Design and Form.

Do you buy or DIY your storage?

Friday, December 6, 2013

Thrifted and gifted - decorating with serapes


Let's take a pause from rhinestone DIYs and mad Cyber Monday shopping to praise the serape - inexpensive, colorful and the perfect covering when temps range from 50 to 35 degrees as they have done here.

I found this serape in a box in storage. I have no idea of its origin. I elevated it from beach blanket to home decor based on the inspiration to follow, which will help you keep your Mex mix cool rather than kitschy.


Pics are: Furbish; Poppytalk; left chair unknown; right chair from Totem; Urban Outfitters; room via Mr. Kate; and my own little room.

Found anything good in a box in the basement lately?

.

Monday, November 11, 2013

Jewelry superstars on Cut Out & Keep


Yours truly was recently featured as a Jewelry Superstar on Cut Out & Keep. However, since you are already at my blog, I'm assuming you already know my projects. Therefore, I'd like to feature a few other recent Jewelry Superstars. Some were familiar names to me. Others were an introduction to DIY bloggers I had never heard of.

Above is the Cosmic Necklace from Minted Strawberry.


Dryad bracelets from Mich L. in LA.


Elizabeth Taylor inspired necklace from Beads Unlimited.


A mini leather belt ring from We Can Re-Do It.


Embroidered leather cuffs from Erin Siegel.


A DIY crystal spike necklace from Thanks, I Made It.

This, folks, is just scratching the surface. Seven projects from hundreds of bloggers. There is no end to ideas and inspiration here.


And here's me and my stuff. Thanks, Cut Out & Keep.

See more Jewelry Superstars here. For craft, sewing, cooking and other superstars go here.

Monday, November 4, 2013

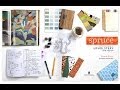
Spruce DIY upholstery book giveaway


Let me get right to the point. I'm giving away a gorgeous DIY book courtesy of Storey Publishing that sells for $35.

Skip to the end if you are only here for free stuff.

For the rest of you, here is a peek inside of Spruce: A Step-by-Step Guide to Upholstery and Design, a new book by Amanda Brown. Amanda, who runs Spruce Upholstery in Austin, is one of those genius people who started pairing modern fabrics with vintage furniture pieces. Her tutorials have been featured on HGTV and Design Sponge. 

Bromeliad the blog is all about reuse, and rescuing solidly made furniture and giving it a makeover is a big-ticket way to reduce waste.

This hardcover book offers gorgeous photography along with detailed step-by-step instructions. It's not just an inspiration book. It's a true do-it-yourself guide. Every step of every project is included, along with photos. 


Part of Amanda's skill is pairing modern fabrics with a vintage upholstery shape, as the examples below show.


The book makes it seem that if you've got the the equipment and space and a tiny bit of spatial intelligence,   a serious upholstery project is within your ability. I have none of those. My only big furniture project - a slipcover I did a few years ago - nearly killed me.  But Spruce did inspire me to drag out this little thrift store footstool and cover it in something fabulous and weird. Right now I'm considering cobalt blue snake.


To enter the giveaway, just be a follower and leave a comment below. Leave extra comments if you mention the giveaway on other social media.  

And don't stop there. You have seven more chances to win by visiting the following blogs: 


Here's more info about the the Spruce book:

And various social media:
Twitter: @StoreyPub, @SpruceHome, #SpruceBook

Enter away!

Friday, October 4, 2013

My DIY quick, cheap and easy pillows


Here's my shimmery silky watercolorish ikat pillow. It cost me a buck to make.

Like a lot of my pillow covers, it started out as a shirt. With my DIY batik pillow and my DIY no zipper shirt pillow, I tried to use existing seams or buttons to avoid work.

However, if that's not an option, you can still make a pillow pretty quick using my method below.


This pillow started out as a large thrift store shirt with poor construction but interesting fabric. The pillow form was a needlepoint thrift store pillow covered with tie dye fabric covered with batik fabric. Awhile back I gave up on zippers. If I want to change my cover, I just sew a new one right over top of the old one.


Step 1 above, cut two rectangles the approximate size of your pillow plus a few inches extra. Put the right sides of the fabric together. Sew two of the seams like an "L" shape as marked in the first photo.

Step 2 above, pull the fabric over your pillow form and pin fit the long seam.

Step 3, pull the fabric off the pillow. Sew along your pin seam, removing pins before you get to them. (Don't sew over the pins.)

Step 4, turn the cover right side out and slide onto your pillow. Fold the raw edges under and hand stitch the short seam closed.


Here's a tip: curve the corners a bit when pinning your seam. This keeps your pillow from having weird poked-out corners.


I had enough shirt fabric for a bed pillow.


And a chair pillow.

You can also make a pillow from a coat and from a skirt.

Tuesday, April 23, 2013

Earth Day DIYs from nature


I'm a day late, but as readers of this blog are aware, every day is Earth Day at Bromeliad.
 
If you're in the market for an upcycled DIY, check out my DIY gallery, which is 90 percent stuff made from other stuff.

Today's roundup is a special kind of reuse - DIYs that come straight from the ground. In other words, the main ingredient is sticks, rocks, branches, bark - the free craft supplies of the great outdoors.
 

Painted stone statement rings from Alisa Burke.
Twig necklace from Plan B.
Gold twig bangles from A Pair and a Spare.
Ring from a rock from Creme de la Craft.
Birch bark lamps from Ruffled.
Driftwood orb at Creative in Chicago.
Painted stone ring at The Perfect Pear.
Stone pendants from Bromeliad.
Gold leaves on a backyard branch from Family Chic.
Twig wrap bracelet from Popsicles and Pinatas.

Monday, January 21, 2013

10 geometric DIYs

 
Winter's austerity tends to lend toward geometric designs. Here are 10 geometric DIYS to keep you on the straight edge.
 
Above, a geometric wire lamp from Weekday Carnival.
 
 
Geometric paperweights from Dot Coms for Moms.


Folded geometric favor boxes or place card holders.

 
Geometric lampshade made from foam core board.


Geometric leather cutouts inspired by Prada 2012 shoes.


Simple cube necklaces.


Taped geometric wall designs from Make My Lemonade Here.
 

Geometric tissue paper lanterns.


Geometric painted wood bangles.


Geometric paper vase. (Slide it over a glass vase.)