Saturday, December 31, 2011

White sofa du jour


Deirdre Heekin and Caleb Barber's place in House Beautiful.

Tip: white and leopard look good together.

Tuesday, December 27, 2011

My DIY: Shorten the sleeves of a sweater


A carmel-y camel-y beige has become my new go-to neutral, but my only beige cardigan (thrifted) had sleeves that hung down like ape arms.

I finally decided to be brave and hack into the world of sleeves.

I have to thank Carly Cais of Chic Steals for her tutorial on how to fit sleeves. I would have never figured out the whole right side out/inside out stuff without her.


First measure from the end of your sleeve to where you want your new length to be. My sleeves were more than three inches too long.


Remove the sleeves and measure down that same distance on the other end of the sleeve and mark. Do this on the outside of the sleeve. (Note: That's your sew line, not your cut line. Leave yourself a seam allowance if you need to cut off excess fabric.)


Since your new shorter sleeve will be a little bit narrower at the arm hole than your old sleeve, you'll need to take in the sides of the sweater a bit. To do this, I try it on inside out and pin fit.


Sew up the sides. Then leaving the body of the sweater inside out, slide in your sleeve right side out.


Match up the bottom seam of your sleeve with the side seam of the sweater and pin. Then sew on the sleeves.


Stay warm and try not to pack on too many pounds this winter now that your sweater is fitted.

Camel


Camel really does go with everything.

This evening I'll share a camel sweater rescue.


Camel also goes with glitter clutchs. So don't forget the glitter clutch giveaway.

Thursday, December 22, 2011

Affordable shoes for the extremely picky


About 90 percent of my shoes are thrifted, so when I do buy a pair, they have to be cheap, fabulous and comfy. This matrix comes together maybe once every two years.

Sadly, the aisles of cheap shoes are filled with stubby-toed flats, platforms the size of bricks and an inordinately large selection of stilettos.

While trendy yet graceful shoes from J.Crew, Madewell, Talbots, Steve Madden, etc. are $70 to $300, here are some similar looks for less.


The bow flat at Kmart (Restricted Footwear Women's Nectarine $32.50)

A tapered toe skimmer flat in happy colors - Urban Outfitters (BDG Leather Pointy Skimmer $34)

The chunky pump - Target (Mossimo Pemota Chunky Heel Pump $24)

The glittery flat or pump - Payless (Chelsea Flat $17)

The colorful suede pump - Target for price, Urban Outfitters for colors (Pemota pump in Coral $24, OU Suede Pump $39)

The animal print pump - Target (Merona Euna Cheetah pump $25)

A really cute tapered animal print flat for around $20 - Still looking.

Tuesday, December 20, 2011

Leopard stools


Noticing lots of little leopard stools lately.

I feel a DIY coming on.


And two more random images from Claiborne Swanson Frank's home in Elle Decor just because it's so bright and happy.


Monday, December 19, 2011

Persimmon


The blog has been a little fruitless lately.

A friend brought persimmons from Florida from his mom's tree. Persimmon - another fruit I never tasted until recently.

Sad that my Ohio childhood was so deprivational.

Friday, December 16, 2011

Sponsored post: My J. Crew-inspired DIY glitter clutch and giveaway


Here's my second DIY glitter project using Tulip's new Fashion Glitter Shimmer Fabric Paint.

Tulip's glitter paint is perfect for the rash of DIY shoe glittering that has swept blog land. Forget the glitter bond and the Mod Podge and the little pot of loose glitter that ends up on the husband and on the dog and all over the house. The glitter is now in the adhesive.

Note that this is glitter in a clear medium. Your surface color will show through, so to avoid many coats of glitter, choose a surface that matches your glitter.

Using two pots of glitter paint, I refurbished two thrift store clutches with ease.

They were inspired by J. Crew's Glitter Purse and Glitter Clutch, below, which each sold for $50 and are now sold out. Which, needless to say, makes a $6 pot of glitter paint sound like a bargain.


Below are both of the clutches before. Both had a few marks on them. But they alse had a nice shape and pretty hardware.


The DIY is a breeze. Just tape off your hardware and paint. The pink satin one took about four coats to completely cover in silver. The marks still showed through slightly on the white one after several coats, so I dabbed on a little white acrylic paint, which then showed through. I kept dabbing on layers of glitter until the white softened up a little.

The patent leather surface did leave slight brush marks, which can be soften by stippling on a few coats of paint.

There was zero flaking off of glitter. The paint can be scratched off the patent leather, so I would not go swinging it into barbed wire fences or anything.


Here's the fun part. I'm giving away both clutches. If you prefer one over the other, say so in your comment. (Disclaimer: A few marks show through just slightly on the white one. On ther other hand, it has the vintage hardware.)

Just be a follower and leave a comment below.


Tulip provided me the paints and compensated me for trying the products. All opinions and the clutches are my own.

Sponsored post: My DIY glittery eco-friendly tank top tote


Tulip asked me to try two new products, Fashion Glitter Shimmer Transfer Sheets and Fabric Paint.

So far I've only gotten to try the paint, and it rocks. After painting three items with multiple coats I found two bits of glitter on my cheek and one on my husband's. (What can I say? We're close.)

No mess. Easy to use. I tried it on t-shirt fabric, satin and patent leather, and it adhered to all three.

I'll show you one project now and another in a few hours.


My first project was inspired by this Ann Taylor Loft foil tote below.


I didn't want to buy a new tote to paint. (If I'm going to do that, I might as well have bought the Ann Taylor one.) And I couldn't find the right kind in my favorite thrifting spots.

So instead I made a variation of the traditional tote bag from a t-shirt.

Here is all the good stuff Tulip sent me.


I picked out the gold shimmer paint and used an extra large men's tank top I picked up at a thrift store.


I used masking tape to tape off the stripes. (Elizabeth at My Growing Home did a similar project with a shirt. I got the tape tips from her.)


Tape the back side as well and make sure the tape meets up evenly. Put some cardboard inside the shirt to keep paint from leaking through and paint both sides of the shirt. (Allow about a half hour for the first side to dry.)


Pull off the tape and you'll have nice stripes.


Turn the shirt inside out and sew up the bottom. I sewed high enough to hide the tank top logo.


Also, I sewed opposite the normal tank top seams. To do this, line up the two side seams across from each other and then pin along the bottom of the shirt. This seems counter intuitive but the bag lays better on your sholder when sewn this way.


You can be done right now if you want. Or for extra credit, you can flatten off the corners to give it a bit of a flat bag bottom shape.


Pros: The paint is way way easier to use than sprinkling loose glitter or mixing it with Mod Podge. Be aware that the glitter is in a clear medium, so your fabric color will show through, especially with only one coat of paint.

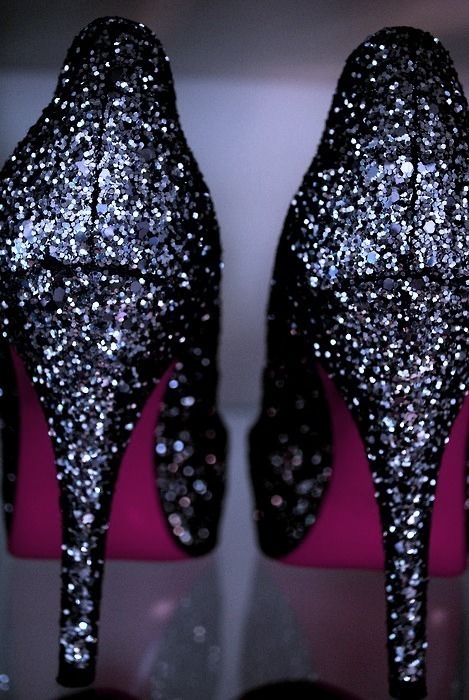
Cons: The paint is $6 a pot, and I had only enough paint for one coat on my tote. Two coats would have looked better but I would never invest $12 in a t-shirt tote. I would reserve this product for high impact glitter accessories like small purses and shoes.


As far as the tote goes, I like that it's light weight and can be folded up inside a purse and brought out only when needed. (And in a pinch it can double as a scarf.)

On the other hand, it ended up being HUGE. I can't imagine what I'd fill it with other than pumpkins.

Seriously thinking about turning it into a scarf.

Tulip provided me the paints and compensated me for trying the products. All opinions are my own.

Thursday, December 15, 2011

Glitter


I used to think glitter was the must useless invention next to rayon. In addition to its ability to render something otherwise practical into something hardly ever worn, it gets everywhere. (You will not catch this girl throwing a fistful of glitter in the air without a Hoover nearby.)

Tomorrow I will be reviewing a product that could revolutionize the DIY glitter industry.

In the meantime, here's some DIY inspiration.


Images: Ari Skyes; Mackie Baby; Unknown; My Cutiest; Love Maegan; Burberry via Cup of Te; Blink Pink; Made by Girl; Pair and a Spare.