Showing posts with label DIY Refashion Tutorial. Show all posts

Thursday, July 18, 2013

My DIY midi skirt makeover


Here's a summer thrift store skirt rescue. With disclaimers.

I liked this skirt for the minty blue color and lightweight  fabric. But it was a size 3X.

I tried a new technique for taking in the sides. It turns out that taking in the sides of a skirt is remarkably difficult. I thought it was just me but a professional seamstress confirmed that it is indeed hard.

The seams of a skirt are curved, especially around the waist and hips, and if you curve wrongly, the whole thing looks bad. If you are me, you keep pinning and repinning to get a fit to the point that a $1 skirt can have $50 of labor invested if you paid yourself a buck an hour.

My new workaround is to use the manufacturer's seam as a guide. This works best for a somewhat flowy skirt and is easiest with an unlined skirt.

Try the skirt on and pinch at the waist where it would fit. Measure the excess. Divide by half. (See this article for more details.)

Turn the skirt inside out. Measure in by the number calculated above and mark with a pin. Continue down the seam line, measuring the same distance and marking. Do the same on the other side.


Try the skirt on to verify the fit is OK.  Then mark the pin line with washable marker. Sew along your line. Trim the excess seam allowance. Done.


For being a quick job, it didn't turn out too bad.


Now for the disclaimer. I choose poorly with my skirt, first with size. When altering down so many sizes, your end product isn't going to look quite right. For one thing, the darts will be in a weird place. My second bad choice was elastic. The elastic waistband in the back of my skirt totally messed up my simplified system.

Trust me on this one: Elastic is evil.

Thursday, June 6, 2013

My DIY 5-minute skirt alteration


Here are two super easy alterations you can make to a thrift store skirt that don't even require a sewing machine.

I've had a lot of success finding colorful skirts in thrift stores, but sometimes the fit and style leaves much to be desired. The 1990s were an era of putting padding where no padding should go (e.g. shoulder pads, harem pants, and adding pleats and pockets to the hip area.)


If we take another look at our wonky skirt from yesterday, you will note that part of the problem is gapping bulky pockets.


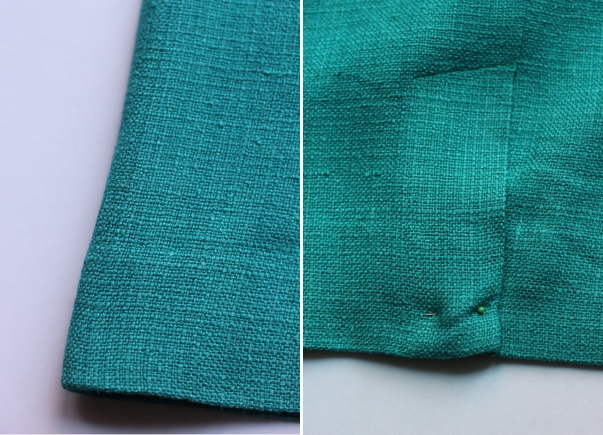
Solution: Pin and hand sew the pockets shut. Turn the skirt inside out and chop off the pockets.


The second alteration helps with the shapelessness you will sometimes see in a second-hand skirt. See how the skirt tapers out at the end when it really would look a lot better if it were straight or even tapered in?

If you don't want to bother with actually tapering the skirt (and you may not want to if the skirt is full at the top since it will just exaggerate the problem), just sew up the back slit.

If the back slit has flaps, make sure they overlap evenly (both flaps should bend in just a tad.) Pin and try moving around in the skirt. If you're OK, then hand stitch the flap shut.


Still a little "poofy" but definitely better.

Have you found any quick fixes for your clothes?

Monday, November 12, 2012

My DIY tapered skirt


Here's a little DIY to help you get more teal in your life this fall. Tapering a skirt is a fairly easy refashion, and tapering can modernize and tailor an otherwise blah skirt.
 
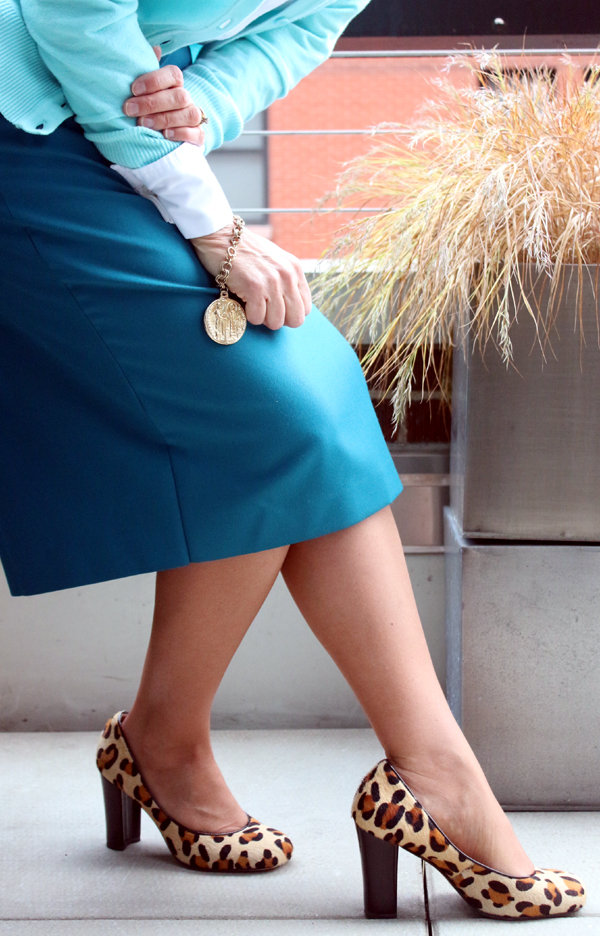
Get a load of this outfit below from J. Crew. Pale blue sweater, teal green Telegraph pencil skirt and the awesome surprise element - leopard pumps. See what $800 and a team of stylists can pull off?
 
 
Inspired, I went looking for a less expensive version of the skirt. Fortunately for all of us, teal was a big color about 20 years ago. This means thrift stores have teal.
 
This particular skirt seen below came with a big awful jacket that I ditched faster than you can say "1980s." The skirt had a great color and nice fabric but still felt frumpy dumpy.  I thought a taper would help.


To taper a skirt, first try it on and then note where the skirt would naturally continue straight or slightly in instead of out. Mark the top of this imaginary line with a pin. Mark your hem with a pin at approximately how far you want the skirt to taper in.


Take the skirt off, turn it inside out and lift up the lining. Use a tape measure to make sure that both sides of the skirt are tapering in the same amount. Also make sure the taper starts at the same spot on the side seam. You want the length of the taper and the angle to be the same on both sides.


Sketch a taper line. Pin along the line (not shown) and try the skirt on. Move around in the skirt to make sure you can sit, walk and so forth.  Then turn the pins perpendicular to the line as show above. Now your taper is ready to sew.

Note: To do this properly, you really should rip out the hem and drop the hem and then sew the taper seam. And then resew the hem. However, if your taper is not too drastic and if you are lazy like me, you can get away with not dropping and resewing the hem. Just sew a straight seam, following the line shown above. Do the same for the other side of the skirt.


See, the seam doesn't look too bad for cheating.


Skirt looks better. Unfortunately gut pleats have not come back like the color teal. You can get around this by losing weight or untucking.


Cardigan:Target. Pumps: thrifted. Bracelet: Mom. Total cost $20. Self styled, thus a little wrinkly.

Would you try tapering a skirt?

Tuesday, August 14, 2012

My DIY photoreal digital print skirt

 
Attention Walmart shoppers, Dries Van Noten in Aisle 9.

Based on your votes and my own ambivalent thought processes, I decided to make a skirt from my photoreal Walmart t-shirt. (Thought process: I could turn a skirt into a clutch later if I wanted; but I can't turn a clutch into a skirt.) BTW, Maya reports this t-shirt is now on sale for $7.


I made some mistakes, but overall it was pretty easy and is proving to be a great summer skirt. Using the hem of the t-shirt as your skirt hem, you can get away with only three seams and no zipper on this baby.

To make this skirt, you will need:
  • an extra large Walmart t-shirt. You may be able to use a smaller size. However, the skirt may also end up shorter.
  • a sewing machine, preferably with a heavy duty needle used for sewing leather or thick fabric. The digital print creates a coating that is hard for a regular needle to get through.
  • washable marker in two colors
  • straight pins 
Turn your t-shirt inside out. Chop off the arms and neck of the t-shirt. Cut away the side seams. (I did not do this. But it's a good idea as you will see later.)

Take half of your t-shirt and lay it wrong side up on a flat surface.

Find a skirt that already fits you and lay it on top. Pin shut any slits in the back or sides of the skirt. Line up the hem of the skirt with the hem of the t-shirt. Mark the outline of the skirt with a washable marker.


Cut out around the shape of the skirt leaving a good inch or two seam allowance. (Not shown.)

Lay the other half of your t-shirt on the flat surface right side up. Lay the cut out piece of t-shirt on top wrong side up. Line up the hems. Eyeball the image and slide the top piece around so you have a continuous image from front to back. It won't be exact but do whatever looks good. A matching hem is more important than a matching image. (I did not think about matching up the image until after the skirt was done.)

Pin about a quarter inch or more outside of the line you marked through both layers of fabric. You want the stretchy fabric to fit a little looser than a non-stretchy skirt (unless you have a smokin' hot bod). Err on the side of largeness. Because of the fabric coating, the needle leaves holes, so seam ripping later is not an option.

Turn it right side out and try the skirt on. Look for weird bubbles or puckers and adjust accordingly. (You will have some puckers just because of the pins.)

When you are happy with the fit, mark your sew line with another color of marker. Turn the pins perpendicular to your sew line.

Sew up both sides of the skirt.


Fold down the waistband. To make it look nice, do a double fold. (A little skinny fold and then a wide fold.) I did not do this because I was using a wimpy needle and I didn't want to sew through an extra layer of fabric.

Set your sewing machine to a long stitch and sew the waistband. The long stitch will allow the waist to stretch around you when you pull the skirt on.


Trim the seams and you are done.

Since we are talking clingy t-shirt fabric, you are going to need a slip and some serious underwear to pull it off (unless you have a smokin' hot bod.)

You can dress it up or down. 


Would you do this to a Walmart t-shirt? And if you did, would you wear it?

Thursday, May 31, 2012

My DIY color for your kicks


My easiest fashion DIY ever over at Dollar Store Crafts.

And a little inspiration.


Have you experimented with colored shoelaces?

Images: Atlantic-Pacific; Snapped4Style; Jag Lever; Dollar Store Crafts

Friday, April 13, 2012

My DIY No. 2 pencil skirt


As my discerning audience well knows, the pencil skirt is it right now.

J.Crew jumped on this trend with both ballet-flat covered feet. The No. 2 Pencil Skirt is synonymous with pencil skirt coolness, comes in every color of the rainbow and costs a whopping $130.


Mine has a real zipper, wasn't hard to do and cost less than $3.

The secret is thrift-store shopping with a very wide net when it comes to size.


Here's what I started off with - a size 16 skirt in a pleasing color.


I took in the sides and faked out the waistband.


And ended up with this.


And, just as J.Crew advertises, it's incredibly versatile.

Get the complete steps on how I altered my pencil skirt at examiner.com.

See 10 ways to wear a J.Crew pencil skirt via A J.Crew Aficionada.

Friday, February 24, 2012

My DIY fitted striped top


I can't seem to get tired of stripes and currently own four striped tops and/or sweaters. What I lacked, however, was a fitted striped top, which I believe is a distinction that readers of this blog will appreciate.

I took a Talbot's top picked up for a few dollars at Goodwill and decided to transform it from loose and casual to fitted, as the inspiration photos below demonstrate.


First step, as you may have figured out by my previous refashions, is to take off the sleeves. (Mark which sleeve is which in case you are spatially challenged like me and can't tell after they are off.) Then pin fit the sides.


To show you my advancement in the refashioning area, note my new favorite tool - washable markers. After you get your fit right and verify that you're taking in equal amounts on both sides, mark the seam, then turn the pins perpendicular to the seam so you can sew over them.


To show you my regression in the refashioning area, also note that I overly fitted the sides. See the hourglass shape? You don't want that. A gentle "C" shape is about as much curve as you should put into a knit top. I've made this mistake, oh, two or three times now.


The shoulders of the original top drooped, so I marked a seam about an inch in from the original using my new marker. Then I trimmed off the excess fabric, leaving a half-inch seam allowance.


As my previous cardigan tutorial showed, you take your sleeve right side out and insert it into the body of the top, which is inside out. Pin the sleeve opening and sew.


Since my sleeves were also loose, I pin fitted them a little tighter, marked the seam and sewed these as well.


It's not perfect. A bit too tight and a little weird under the pits. But definitely more wearable.

Now I just need to find a striped top with wide stripes that is also fitted, another distinction I think you all appreciate.

How many stripey things do you own?

Images: Masmoniquilla; Refinery 29; Thrild via The Mannequin

Monday, January 30, 2012

My DIY extreme cardigan makeover


Inspired by this. (J.Crew, almost $200 but cashmere.)

I made this. (Thrifted, less than $1. Not cashmere.)


From this.


Yeah, it was enough sweater for two people.

You combine taking in the sides with taking in the sleeves and add taking up the shoulders, below.

If you've got any fears about refashioning old clothes, this will blow them out of the water.