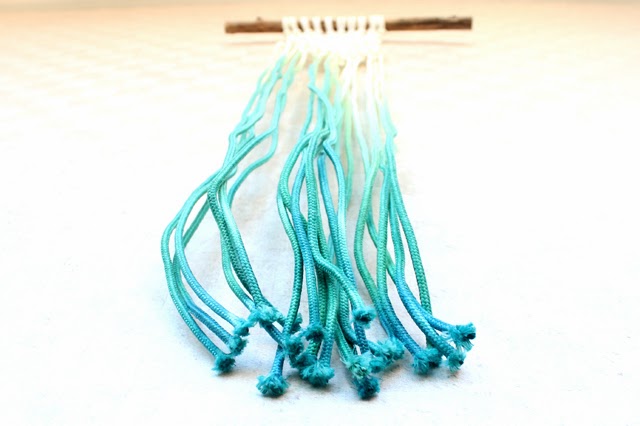
This is a simple straightforward DIY. However I managed to make a number of mistakes for your benefit. I'm generous that way.
This post is sponsored by Tulip's I Love to Create line, which is promoting a number of neon products to brighten your winter.
This promotion gave me a chance to try one of my back-burner projects - a hand-dyed macrame wall hanging - for about $10. (See this post for inspiration from some real macrame artists.)
(The neon fabric markers, paint and dye are only available at Michael's. If, like me, you've got no Michael's anywhere, you can get free shipping on neon Tulip products when you use coupon code #NeonFEB at checkout on iLoveToCreate.com during February.)
I tried the mini tie-dye. The kit contains five small squirt bottles with powdered dye. Just add water to the line on the bottle and squirt on your item. I've used the full-size bottles of this dye and can vouch for it being super easy.
In addition to the dye, you'll need:
- a wood dowel or stick from the back yard that's about a foot long.
- 100 feet of white laundry rope.
Cut the rope into 10 piece that are 10 feet long. Fold in half and loop over your stick with a lark's head knot.
Then tie a series of square knots in whatever pattern you like. You can vary the pattern by tying your knots close together or far apart.
See below for how to tie a square knot.
Stagger the knots to create a pattern.
Below I varied the pattern first with some spaced out knots followed by a few rows of knots tied more closely together.
After about 10-12 rows of knots, give your wall hanging a haircut. Trim the bottom of your ropes so they are even.
Put some plastic on the floor and a layer of paper towels. Spread out your macrame and then squirt on your dye. I did a section of blue and then a section of green and a section of overlap.
Wrap the hanging in the plastic and allow to sit for 6 to 8 hours. This slows the drying process and allows the dye to set.
Get excited because the dye looks booooootiful at this point (before you start messing it up.)
Here's how to not mess it up:
- Don't overdo it with the dye. The color will wick its way up the ropes. So just dye the bottom fringe of your macrame and let it soak its way up the ropes.
- Hook the top part of your wall hanging so it hangs up off the floor. Allow the dyed section to lay flat on the floor. This helps the white part of your wall hanging to stay white and the dyed part to hang onto its dye. If you let the whole thing lay flat, the dye will wick its way up your ropes unevenly. If you hang the whole thing up, dye will drip off the bottom and you will lose some color.
- If you hang it up and have the rope kind of in a pile on the floor, the color will wick its way up unevenly.
- If the color is uneven, you can correct it by bleaching where you don't want color.
- If you bleach and then hang the whole thing up, guess what! The bleach wicks down the ropes and you lose 75 percent of your dye job.
Here's how it looked before the bleach job.
And after.
Thus I ended up with a mostly white macrame wall hanging with a wee bit of color on the end.
At this point it's best to pretend the effect is intentional and proudly pin your project, knowing that others can do far better than you.
This is a sponsored post. I received the nice Tulip products for free. All opinions and mistakes are my own. Here are some social media links:
- Facebook: facebook.com/lovetocreate
- Twitter: twitter.com/ilovetocreate
- Pinterest: pinterest.com/ilovetocreate
- Blog: http://ilovetocreateblog.blogspot.com
And projects from other bloggers:


I haven't macrame'ed a wall hanging in forever! I do love how your "accident" turned out....very sophisticated! Thanks for inspiring me today!
ReplyDeleteI totally love how it turned out! The pop of color at the bottom is a nice surprise!
ReplyDelete